

status: success in the sandbox. The sandbox is what people usually call the test environment — no real money moves.
How Payments Work makes this easier to follow, especially the difference between a Session and an Order.
How this maps to the dashboard
The sandbox dashboard home page shows a three-step onboarding guide. This page follows those steps and adds the API calls and checks needed to complete a test transaction.
The steps unlock in order: complete the current step before opening the next one. The sandbox does not include account verification or collect real verification details. Account verification is a separate production-only process described in Go Live.
Before starting
Register a sandbox account first. Openuat-dashboard.clinkbill.com/auth/register and fill in four fields: email, password, password again, and an invite code.
Without a code, email contact@clinkbill.com to request one.
Log in straight after registering.
Step 1: Confirm your test purchase details
Decide how items are defined first. Everything below follows from this choice.One-time order
Describe the name, unit price, and quantity directly in
priceDataList when creating the Session. Good for single purchases, top-ups, and one-off services — no product needs to exist first.Fixed product or subscription
Create the product and price on the Products page first, then reference them by
productId and priceId. Good for recurring goods, plans, and subscriptions.Step 2: Integrate and complete a test payment
Five parts. Configure the webhook before paying, so one payment verifies the whole chain.2.1 Get a sandbox key
In the sandbox dashboard, go to Developers and click Initialize Key. The Secret Key is shown in full exactly once. Copy it before closing the dialog.Generate a key
Generate a key
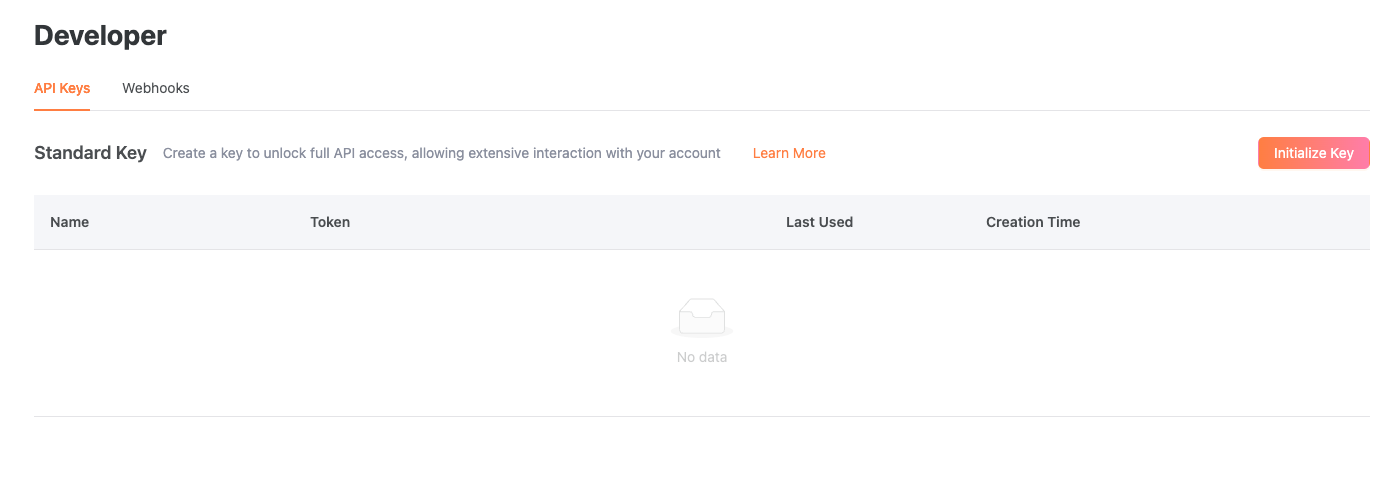
sk_uat_. A key starting with sk_prod_ means the wrong dashboard.
2.2 Configure the webhook
Clink pushes the payment result out. Only two sources establish that the money actually arrived: a signature-verified webhook, or the server readingsuccess from GET /order/{orderId}. Browser redirects and frontend SDK events do not count — a customer can fake either one.
Go to Developers > Webhooks, click Add, enter a publicly reachable HTTPS URL, and select the events to subscribe to. For payments, subscribe to at least order.succeeded and order.failed.
Local development has no public address. Use a tunnel such as cloudflared to expose one temporarily. localhost, loopback, and private IPs are rejected.
2.3 Create a Checkout Session
This runs as-is once the key is swapped in.X-Timestamp is a millisecond timestamp. Compute it per request — never hardcode or cache it. The sandbox is lenient about this, but production only accepts values within 2 minutes of platform time, so a shortcut here fails everywhere on the first production call.
customerEmailidentifies the customer.customerIdandreferenceCustomerIdwork too, but at least one is required — omitting all three returnsCUSTOMER_NOT_FOUNDpriceDataListdescribes what is being bought. It cannot be empty, unless the registered-product mode from step 1 is used instead, sendingproductIdandpriceIdoriginalAmountandoriginalCurrencyare the amount and currency, both required- Amounts are in the major currency unit, not minor units. USD 19.99 is
19.99. Sending1999means USD 1999 merchantReferenceIdis the merchant order number, for reconciliation. It is not an idempotency key — calling twice with the same value produces two different SessionssuccessUrlandcancelUrlonly control where the customer lands afterwards. They have no effect on whether the payment succeeds
Currencies with no decimal places — JPY, KRW, IDR — accept integers only. 1999 yen is
1999.data:
sessionId on the merchant order. url is the checkout page, used in the next part.
expireTime currently comes back as "2026-07-30 12:00:00" — no timezone designator, and not RFC 3339.Do not hand it straight to new Date() or parse it as local time; different runtimes will disagree.Do not infer a “merchant account timezone” or the browser timezone either. The backend currently serializes using the service process default timezone, with no per-account conversion, so the string does not state which zone it belongs to.Precise cross-timezone handling has to wait until the backend upgrades this contract to RFC 3339 with an offset, or to a Unix timestamp. Until then, read status to decide whether a Session can still be paid rather than computing from this string.The sandbox dashboard also has a Generate test checkoutUrl button. That one is for seeing what checkout looks like — the dashboard frontend calls the Checkout API directly, so it never touches the merchant server. To verify a real integration, create the Session through the API as above.
2.4 Pay with a test card
Openingurl in a browser lands on Clink’s checkout page.
After paying, the browser goes to the configured
successUrl.
2.5 Check all three places
One payment has to line up in three places before the integration counts as working:1
The Order status is success
Look up the session with the Then read the Order. Only
sessionId from 2.3. status should be completed and orderId should have a value:status: success means the payment went through:2
The transaction appears in the dashboard
Find it on the Transactions page of the sandbox dashboard. Sandbox and production have separate transaction lists, so do not look in production.
3
The service received the webhook
With the webhook configured in 2.2, the service should have received an
order.succeeded event. If not, work through the debugging section of Go Live.If 2.2 was skipped, configure it now, then rerun 2.3 and 2.4 to verify.What this page verifies is a one-time payment. Recurring billing and discounts are separate capabilities with their own integration paths — see the cards below.
Step 3: Ready for Go-Live
After the test payment is complete, selectGo live in Step 3. This action completes Step 3 and takes you into production. After it succeeds, the onboarding progress shows 3 / 3 and Complete becomes available. Select Complete to finish and hide the onboarding guide. Complete does not take you into production.
Account verification takes place only in production; the sandbox does not collect or migrate verification details.
Sandbox done — move to production
The Step 3Go live action handles first access to production. For later environment switches, Enter production remains available in the top right of the sandbox dashboard. There is no second registration.
In production, initialize fresh sk_prod_ and pk_prod_ keys, register the webhook endpoint again with its new signing key, and submit real account-verification details.
Sandbox payment-domain resources and environment-specific configuration are not copied to production, including products, customers, orders, API keys, webhook endpoints, signing keys, and verification applications and details. On first access to production, Clink synchronizes the tenant, merchant, user sign-in credentials, and role assignments required for production access.
After selecting Complete in the original sandbox tab, the sandbox onboarding guide is hidden. Follow the existing production onboarding flow for account review and launch preparation.
The full cutover list and debugging steps are in Go Live.
Once this works
Choose an integration
Redirect to checkout, or embed it in a merchant-owned page.
Hosted Checkout
What to write on the backend, the frontend, and the webhook.
Subscriptions
For recurring billing.
Discounts and promotion codes
For discounts and promo codes.
API keys & webhooks
Key rotation, IP restrictions, signature verification.
Go live
The checklist before production, including account verification.